Nation State Quality OSINT on a Taco Bell Budget – Part 1
I remember taking digital forensics classes years ago and at the very end of the class feeling like I had learned a ton, had a great time, but was also wondering “Ok, what’s next?”
When I’m teaching OSINT or other technical topics I often hear “This has been great! What’s next?” For some people, the next step is learning a programing language like Python to write your own custom tools such as web scrapers.
Over the past year, I’ve found myself using Amazon Web Services (AWS) services more and more in OSINT tools that I write. They are very well documented but recently when I’ve been talking with other OSINT practitioners, I’ve realized that the part that often leaves people feeling overwhelmed is knowing what is available and how it can be used. In this multi-part blog series, I’ll provide a brief introduction to several of the AWS services as well as some code samples showing how we can use them on OSINT projects.
Some of the services that we’re going to use in this series are:
Awscli: This is the AWS Command Line Interface. I have it installed on my host and on my virtual boxes. It has a ton of uses but our main one here is we’ll enter our credentials into it and then the rest of our programs we run on that system will automatically use those creds.
Rekognition: Rekognition is Amazon’s image and video analysis service. We’re going to use it for labeling images, facial recognition comparisons and some text extraction.
Lightsail: I’ve been using Amazon’s E3 virtual boxes for several years to spin up boxes for online tasks. Lightsail is a more cost effective alternative to those E3 boxes. They’re pretty cheap. Like $3.50 to $5.00 a month cheap. We’ll be using these to let some of our code live in the cloud and run constantly.
Lambda: Lightsail lets us have our code running in the cloud 24/7 for as little as $3.50 a month. But what if instead of needing something running 24/7, we only need some code to run once every hour and only for a few seconds. In cases like these Lambda may be the perfect option for us. Lambda is AWS serverless code engine and we’ll use it to run a scrapper that runs every once in a while and is free.
SES: If we’re writing all of this persistent monitoring code that’s going to live and run in the cloud, how are we going to get notified when we get a hit? The answer is using Sendmail with AWS SES to send our email notifications.
DynamoDB: Some of our code will require a database to store results and AWS even provides one of those in the form of the incredibly versatile and lightly structured DynamoDB.
Translate: Amazon’s machine translation engine is really solid and incredibly cheap. They have a free tier that provides 2 million characters per month for 12 months. To put that in perspective, I recently incorporated it into some twitter code that I wrote and that’s enough to translate about 14,000 tweets a month without paying a penny. After the free one year period expires, the cost is $15 per million characters.
Now, let’s take a second to talk about what this series will not be. I’m not an AWS expert. I know a few people who are, but I’m not one of them. AWS has fantastic documentation and I will not attempt to compete with it. This is an introduction of some of the services that I’ve learned about and found useful.
Also, I’m not a programmer. I can write ugly but functional code that helps me and my friends with our tasks. Please don’t judge me too harshly on that front 🙂
With those caveats out of the way, in part one of this series we’re going to set up an AWS account (if you haven’t already), install and configure the aws command line interface and then use the Rekognition service to help us solve a few problems.
Creating an AWS account
The first thing you should do (if you already haven’t) is head to aws.amazon.com to sign up for an account. As you can see from the screen shot below, Amazon has a very robust free tier and most of our projects will stay inside of that range. For example the Rekognition service that we’re going to use in this post allows for processing 5,000 images a month for free.
Downloading awscli
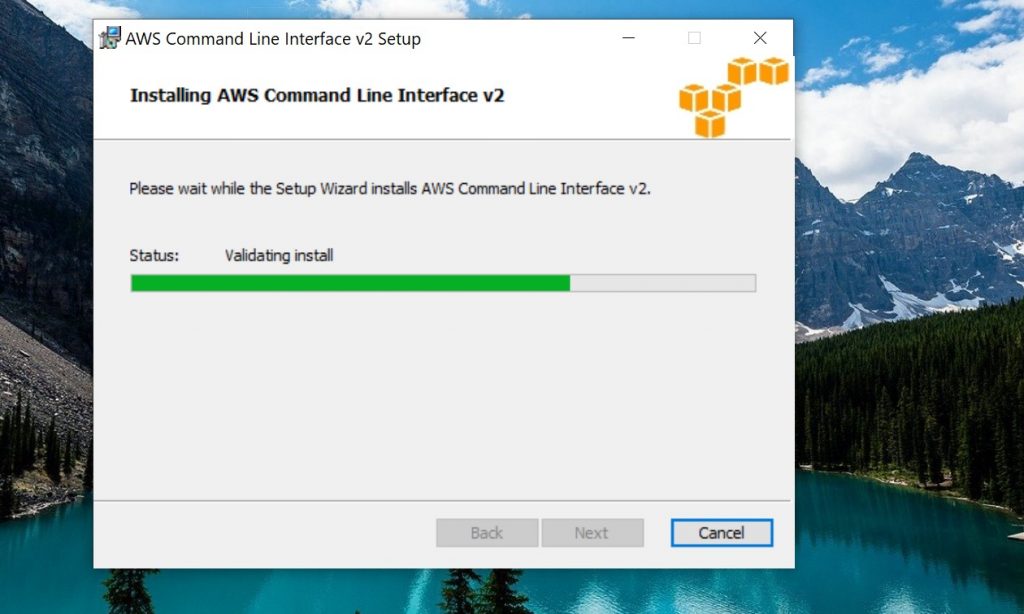
The next step is to download the aws command line interface tool. You can find the download here: https://docs.aws.amazon.com/cli/latest/userguide/cli-chap-install.html
For this post I installed version 2 of the Windows awscli but use whatever one is appropriate for your host. In later posts I’ll be using the Linux version on an AWS lightsail box.
We can confirm the installation worked by opening up a command prompt window and running aws –version
Boto is the Amazon Web Services (AWS) SDK for Python so the next step is to install the boto3 library for your python install. In this screenshot you can see I ran pip install boto3

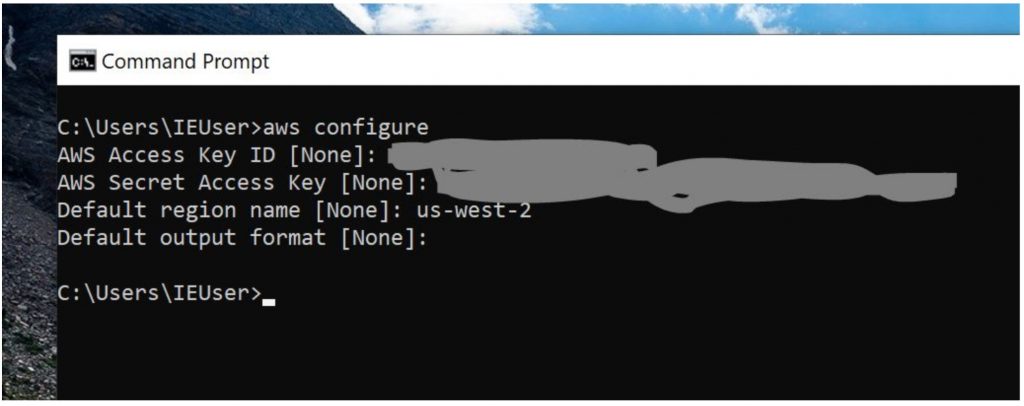
When the above steps are completed, we’re then going to take your api key and secret access key from your AWS account and enter them into your awscli. With the creds in place, the rest of our programs should magically work without us having to hard code our credentials into the code.
We do this by running aws configure and entering the appropriate keys and region settings.
With the prerequisites in place, we’re now ready to have some fun with Rekognition.
The first thing we’re going to do is use some very simple code to make sure everything is configured correctly. We’re going to have rekognition look at an image and generate some “tags” of what it thinks an image is about. All of the code samples in this post are going to be modified code samples from Amazons rekognition section at https://us-west-2.console.aws.amazon.com/rekognition/home
import boto3def detect_labels_local_file(photo): client=boto3.client('rekognition') with open(photo, 'rb') as image: response = client.detect_labels(Image={'Bytes': image.read()}) print('Detected labels in ' + photo) for label in response['Labels']: print (label['Name'] + ' : ' + str(label['Confidence']))def main(): photo='test.jpg' label_count=detect_labels_local_file(photo)if __name__ == "__main__": main()the code above will analyze the file test.jpg and will attempt to identify potential labels for the picture based on entities it sees.

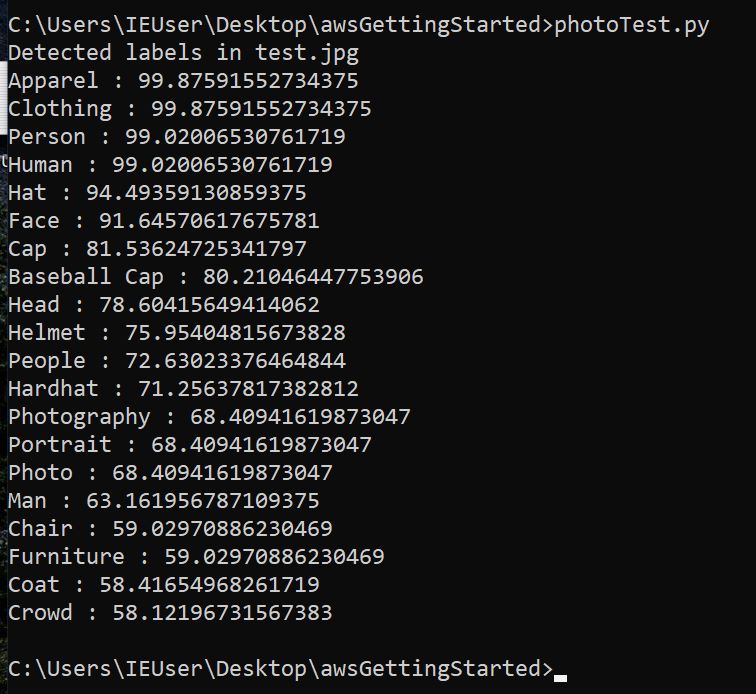
That may not be the most useful thing in the world for OSINT, but it’s pretty darn cool and more importantly, it shows that our configuration is correct and all of our future AWS code on this system should authenticate with no issues.
For our next rekognition program, let’s help solve one of the most common problems facing OSINTers. For anyone reading this who has ever walked into a room of people doing OSINT work and seen multiple people gathered around a single monitor looking like they’re deep in thought, you don’t have to ask what they’re doing, you know what they’re doing. What they’re doing is looking at two pictures and trying to determine if it’s the same person. You can try to flip the images upside down, draw triangles on the face to compare ratios and other tricks, but wouldn’t it be nice to have a mature facial recognition engine give a quantitative score on if it was the same individual in both pictures. Rekognition can do that!
import boto3import os##Walking the ./source_images and ./target_images folders to grab the imagesdef main(): for source_image in os.listdir('./source_images'): for target_image in os.listdir('./target_images'): print('[+] Comparing {} : {}'.format(source_image, target_image)) try: image_comp(source_image, target_image) except: print("failed. Maybe there isn't a face in the picture?")def image_comp(source_image, target_image): client=boto3.client('rekognition') imageSource=open('./source_images/{}'.format(source_image),'rb') imageTarget=open('./target_images/{}'.format(target_image),'rb') response=client.compare_faces(SimilarityThreshold=70, SourceImage={'Bytes': imageSource.read()}, TargetImage={'Bytes': imageTarget.read()}) for faceMatch in response['FaceMatches']: position = faceMatch['Face']['BoundingBox'] similarity = str(faceMatch['Similarity']) print('[+] The face at ' + str(position['Left']) + ' ' + str(position['Top']) + ' matches with ' + similarity + '% confidence') imageSource.close() imageTarget.close() if __name__ == '__main__': main()The above code takes the images from the source folder and compares the faces in them to the faces in photos in the target folder. It’s important that pictures with only a single face be in the source folder but rekognition will compare those faces to each face in every image in the target folder.
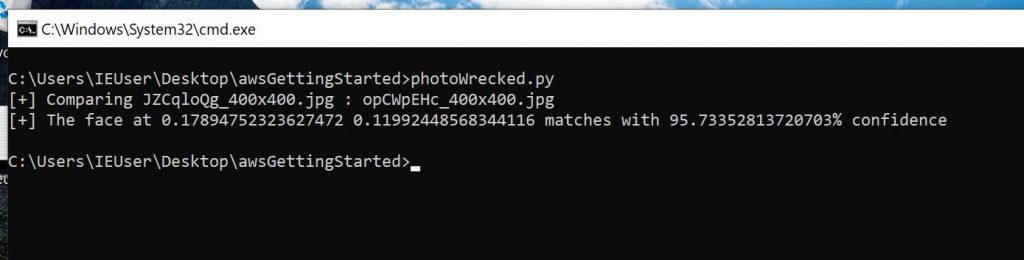
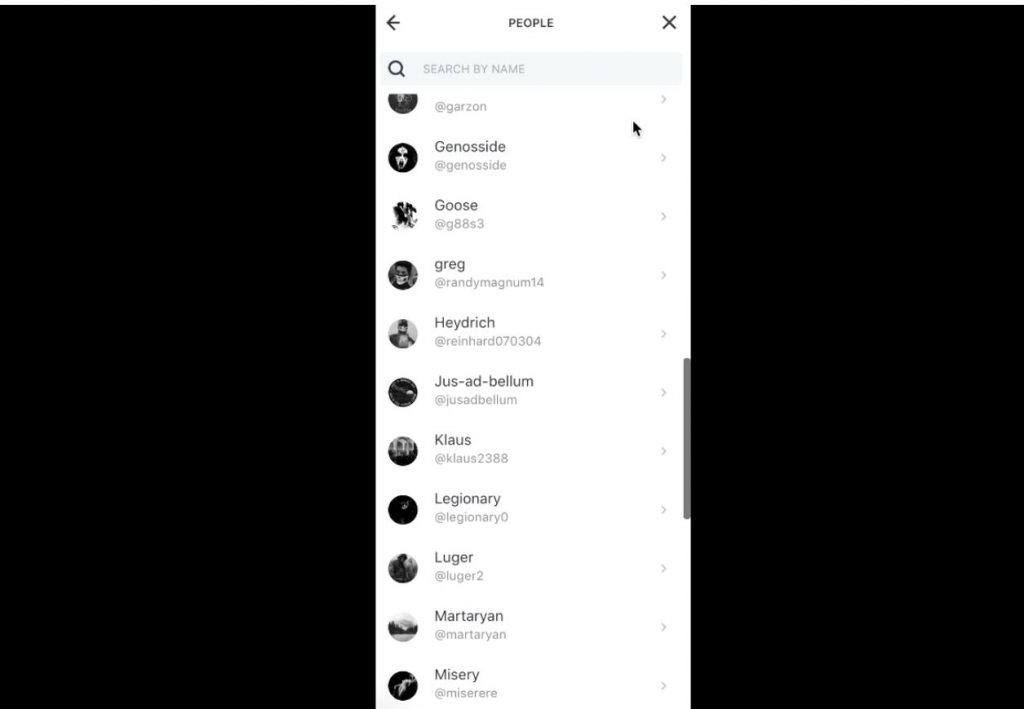
In this case I had the photo of me in the grey hat in my source folder and this image in my target folder.

When I ran the code, it gave me a score of 95.7% that it was the same person. Since it will compare to multiple faces in each of the target images, you can see it gives a location within the picture as the first part of the results.
This example shows us that even with some very simple code, AWS services can help us solve difficult and common OSINT challenges.
For the last example in this post, we’re going to look at an extremely cool capability within rekognition. The ability to extract text from images.
Last month unicornriot.ninja pushed a large amount of screen captures from chat forums that they’ve associated with neo-nazi activity. The full article and datasets can be found at: https://unicornriot.ninja/2020/leaked-neo-nazi-terrorist-feuerkreig-division-organizing-chats/
We all know that a picture is worth a thousand words, but unfortunately when you’re trying to extract selectors, you would much rather have a text file 🙂
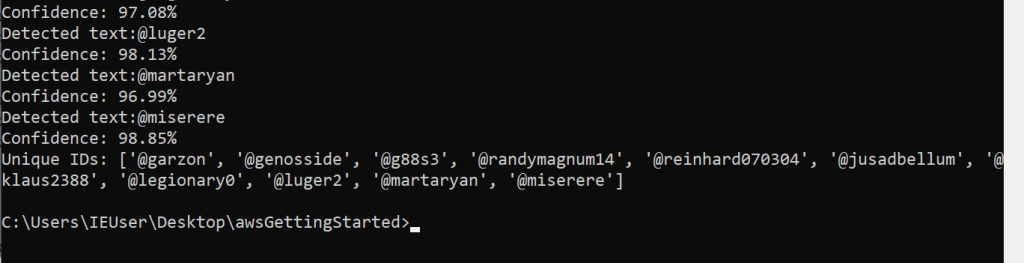
Here is one of the pictures with a list of members from the group:
We could go through each of these and manually extract the users but across hundreds or thousands of pictures, that’s not tenable. Let’s see how rekognition can help with this problem.
import boto3unique_ids = []client=boto3.client('rekognition')sourceFile= './FKD_Member_List-October-2-201900009.png'imageSource = open(sourceFile,'rb')response = client.detect_text(Image={'Bytes': imageSource.read()}) textDetections=response['TextDetections']print ('Detected text')for text in textDetections: if text['DetectedText'][0] == '@': ## We're only interested in usernames which start with @ unique_ids.append(text['DetectedText']) print ('Detected text:' + text['DetectedText']) print ('Confidence: ' + "{:.2f}".format(text['Confidence']) + "%") else: passunique_ids = list( dict.fromkeys(unique_ids) )print ('Unique IDs: {}'.format(unique_ids))The above code extracts the text from the FKD_Member_List-October-2-201900009.png image file (it could easily be modified to open all of the images in the directory like our facial comparison program does), identifies which pieces of text start with a ‘@’ and inserts those text items into a list. Since text fields can get detected as a line and as text, we want to remove all of the duplicates from the list. We achieve this down at the bottom of the code by turning the list into a dictionary (which removes the duplicates), and then back to a list which we print.
There are some pricey tools out there with similar OCR capabilities for e discovery and similar tasks, but it’s pretty cool to replicate a lot of the functionality with a few lines of python code.
The code samples for this post were straightforward, but hopefully you picked up a few things that you can use to help you in your research and reporting. I’m not sure which of the services we’ll play with for the next post but we’ll likely be doing it from a lightsail instance or a lambda function.
Finally, in keeping with the title of the series, at the end of every post we’ll figure out how many tacos we could have bought at Taco Bell for the cost of our AWS stack. Since everything we did in this post was well within the free tier, our current tally is zero tacos.

Comments
Post a Comment